Monday, March 12, 2012

Wiiiingz

There's nothing better than a plate full of chicken wings.  Today it seems like every restaurant on the planet has some kind of chicken wing on their menu, and with a billion different flavors out there it can be hard to choose a favorite.  There's no doubt that home made is always going to be the best but my favorite wings are the Kentucky derby bleu cheese wings at Velocity 5 in Arlington VA.

This recipe is a simple dry rub that can be altered in so many different ways ( I added chili flakes to mine.) So get those wet-naps ready cuz these wings will rock your socks!

Here's what you'll need
Makes enough rub for about 20 wings
Ingredients:
3 TBS dark brown sugar
3 TBS salt
1 TBS freshly ground black pepper; coarsely ground
1 TBS paprika
1 tsp. garlic powder
1/2 tsp. dry mustard
A bit of olive oil to brush on the wings

Directions:
1. Preheat oven to 375 degrees.  Combine all of the dry ingredients in a bowl and mix well.  Cut the tips off of your wings if they came with them.  Remove any extra feathers that may still be on the chicken.
2.  Brush on a bit of olive oil on to each wing coating the entire thing.  Sprinkle the dry rub onto the wings and don't be shy with it!
3. Place on a baking sheet lined with tinfoil and pop those babies into the oven for 45 min or until the skin is nice and crispy golden brown.
4. Put them in your mouth and enjoy!

image_1

Saturday, March 10, 2012

God like brownies

These are hands down the best brownies I have ever tasted in my life!  I got this recipe from The Londoner and they aren't kidding when they say "Best brownies in the WORLD."

They're very easy to make, needing only three common ingredients that most if not all households have on hand. You can opt for the easy way by using boxed mixes or if you're feeling really adventurous make your own!  I will talk no more and let you bake these heavenly treats.

Ingredients:
1 Box of oreos
1 Box of fudge brownie mix
1 Box of chocolate chip cookie mix

Directions:
 Preheat oven to 350 degrees. Line a baking tray with parchment paper.
Follow the instructions on the cookie mix box & stir until you have gooey cookie dough, add a little extra water and oil to what they suggest, it just keeps it moist as you'll be baking it for longer than suggested. An extra teaspoon of each is just right.

Mix up your brownie mix as the directions say on the box.

Press the cookie dough into your paper lined pan until the bottom is covered.  Next place a layer of oreos on top.  Lastly pour the brownie mix on top and even it out.

Bake for about 30mins.  Bake time may vary depending on your oven but it shouldn't take less than 30 mins for these babys to cook.

When done let cool for about 5min then remove from pan using the paper to lift it out onto a cutting surface.  Cut yourself a big chunk, piece, slab, whatever you feel you can eat at the moment! Get a big glass of milk too and enjoy!
(Recipe credit goes to The Londoner)

image_1

Friday, March 9, 2012

Japanese cucumber salad

I L-O-V-E Japanese food!  It's always flavorful, super colorful, and good for you.  Today I decided to start out with a Japanese style cucumber salad with seaweed wrapped shrimp.  This dish makes a great light lunch or a perfect afternoon snack.  It's easy and quick to make, and many of us already have the ingredients to make it.

The one item that you may not have is the seaweed or nori as it's usually called in supermarkets.  Nori comes in a package of 6-10 sheets and can be found in the Asian food section of your local super market.  Anyone that eats sushi is familiar with this green food that is wrapped around their rice and can tell you that it tastes great!

When using nori you must make sure that your work surface is dry and clean, water will make your nori very soggy and hard to work with if you need to cut it.

Here's what you'll need to get started:
Ingredients:
2-3 sheets of nori
1 large English cucumber
1/4c rice vinegar
1tsp. sugar
1/4tsp. salt
2 Tbs sesame seeds, toasted (see details below*)
10 small shrimp or 5 extra large shrimp (uncooked)

Instructions:
1. Wash and peel your cucumber to leave alternating green stripes.  Slice the cucumber in half lengthwise.  Using a sharp knife or mandolin, cut into thin slices.  Place in a double layer of paper towel and press down gently to remove excess water.
2*.To toast the sesame seeds, heat a small dry skillet over low heat.  Add seeds and stir constantly until golden and fragrant, about 2min. Transfer to a small bowl and let cool.
3. Combine vinegar, sugar and salt in a medium non reactive bowl, stirring to dissolve. Tear pieces of the nori off and add to the liquid mixture. Add the cucumbers and sesame seeds; toss well to combine.  Store in refrigerator until ready to serve.
4. Bring a small pot of water to a low boil.  Very carefully slice the nori into strips wide enough to wrap your shrimp in. Meanwhile start cooking your shrimp in the small skillet until it reaches a nice pink color.  Set aside when done.  Dip each strip of nori one by one into the boiling water until it softens, about 5sec then very carefully take it out with a fork and place on a plate allowing part of the edge  to hang off so you can pick it up.
5. Carefully wrap your shrimp in the nori going around the curved edge of the shrimp.  Don't worry if you tear the nori it'll adhere to its self if you stick another piece on.
6. Plate your cucumber salad and shrimp. Serve with soy sauce and wasabi.
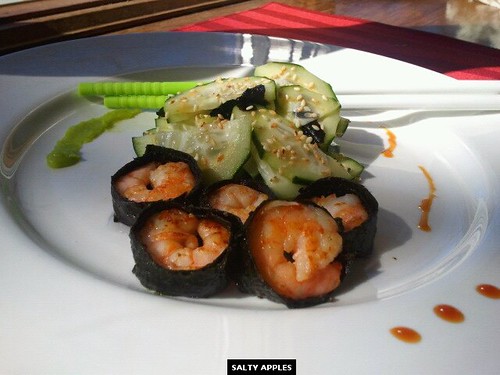

image_1

Wednesday, March 7, 2012

10 minute baked potatoes

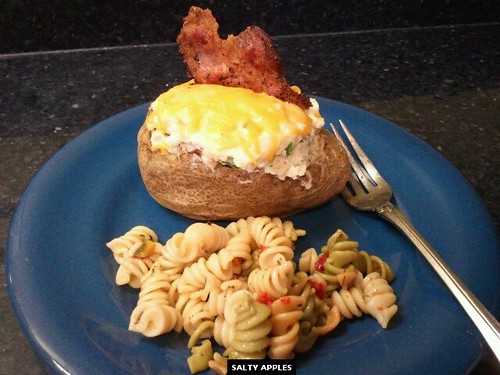
Everyone loves a good fully loaded baked potato and these are to die for.  These quick and easy 10 minute baked potatoes are great for a quick lunch or an addition to dinner.  Lets face it no one wants to wait an hour for a potato to bake anymore, we want our food fast!


My baked potatoes have all of the fixings; chives, bacon, sour cream, cheese, and salt & pepper.  Anyone on a diet or health conscious person should not eat these since they are a bit unhealthy for you (but delicious)!


Here's what you'll need:
Recipie Yields 1 serving


Ingredients:
1 large baking potato
3 Tbs. fat free sour cream
2-3 strips of bacon
1 Tbs. finely chopped chives
2 large button mushrooms
lots of shredded cheese
salt & pepper to taste


Directions:


  1. Preheat  your oven broiler ~500 degrees non convection.
  2. Scrub potato under cold water. Prick several times with a fork. Place in a microwave safe container. Make sure you vent the lid of the container a bit to let some of the steam out.
  3. Place potato in the microwave for about 5-7 minutes on HIGH. Times may vary depending on your wattage.  
  4. Meanwhile cook the bacon in a skillet until well done and crunchy.  Slice the mushrooms and cook with the bacon until tender. When done crumble or chop the bacon into small pieces.   Rinse and chop the chives into small pieces, set aside.
  5. In a bowl combine the sour cream, chives, bacon and mushrooms. Set aside.
  6. When the potato is done very carefully open the lid to the container making sure to keep fingers away from the steam.  Cut off the top of the potato and spoon out the inside of the potato (leaving the skin and a little of the potato flesh intact) into the sour cream mixture. Mix thoroughly, mashing the potatoes a bit.  Add salt and pepper if desired.
  7. Spoon the potato mixture back into your potato skin. Don't worry it'll all fit just mush it down with the spoon!  Top with cheese and place in broiler until cheese has melted.
Quick and easy potatoes! Serve with dinner or eat it as is!
Enjoy! =]

image_1

Monday, March 5, 2012

Lemon chicken rice soup

There's nothing better on a cold day than a bowl of hot soup.  I love love love lemons and rice so I made soup!  Lemons can be used in so many different ways such as in marinades, marmalade, lemonade, and various other things.


The leaves from the lemon tree are often used in teas and for medicinal purposes. Lemon leaves are considered to be helpful as an anti-inflammatory agent and aid to digestion or in reducing fevers and cramps. The lemon leaf tea also acts as a cough medicine, also the low pH of lemon juice makes it antibacterial but don't go squeezing lemon juice on your kids cuts and scrapes!


This soup is VERY lemony and thick.  If you like, you can reduce the amount of lemon juice added and increase the amount of chicken broth used to make it less thick.


Lemon chicken rice soup:


3 1/4 c. chicken broth
1 chicken flavor bouillon cube or 1 tsp. instant chicken bouillon
1/3 c. uncooked regular rice
1/3 c. diced carrots
1/3 c. chopped celery
1/4 c. finely chopped onion
1 c. cubed, cooked chicken
3 tbsp. butter
2 tbsp. flour
3 eggs
6 tbsp. lemon juice
Salt & pepper to taste
Lemon slices (opt.)
Sliced green onions or dill (opt.)


In large saucepan, combine chicken broth, bouillon cube, rice, carrots, celery and onion. Bring to a boil. Reduce heat; cover and simmer 20 minutes or until rice and vegetables are tender. Stir in chicken. Remove broth mixture from heat.
In small saucepan, melt butter. Stir in flour. Cook 1 minute, stirring constantly until smooth and bubbly. Gradually stir in 2 cups broth mixture; cook until slightly thickened, stirring constantly.
In small bowl or stand mixer beat eggs until frothy. Gradually beat in lemon juice and 2 cups thickened broth mixture. Slowly add egg mixture to broth mixture in large saucepan, stirring constantly. Heat gently until soup thickens enough to coat a spoon, stirring frequently; do not boil. Salt and pepper to taste. Garnish each serving with lemon slice, onions or dill. Makes about 5 (1 cup) servings.

image_1

Sunday, March 4, 2012

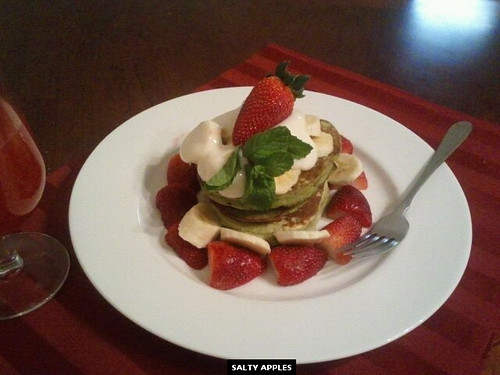
Green tea pancakes anyone?


Now I know what most of you are probably thinking "why in the world would I put tea in pancakes?!"  Well ladies and gentlemen, green tea pancakes are exceptionally good tasting and very good for you. If you’re looking to wake up with a little boost, here’s one way. It’s not the only way to cram antioxidants into your early-morning diet — a pile of cooked greens could fulfill — but it’s certainly a change of pace for that chore. They say that green tea also helps you focus, and it does contain caffeine, too, so this might be like getting your cup of coffee (or tea) in solid form, too.

We all know that green tea is a great source of antioxidants. But when drinking matcha, or eating it as a baked good, you actually ingest the whole tea leaves, instead of just water steeped in them. Therefore, you take in about three times the nutritional benefits of regular brewed green tea. This includes the amino acid L-theanine, which is known to reduce stress and depression, as well as antioxidants to combat free radicals in your system. Also, matcha has a delightfully grassy, slightly bitter flavor that pairs well with sweetness.  

Here's what you'll need to make these seriously strange-looking stack of pancakes.

**Matcha powder is powdered green tea and can be purchased at your local health food store, from most tea shops, or online. This is the same stuff that Starbucks Coffee Co. uses in their green tea frappuccino.  I get mine from Mighty Leaf Tea. Its pricey but well worth it since you'll only be using about 1Tsp if that each time you make it.
Green Tea Pancakes
(makes 4-6)
1 cup all-purpose flour
1 teaspoon baking powder
2 grams (about 1/2 tsp) matcha powder**
2 teaspoons sugar
1 egg
1 cup milk
butter for the pan
(or you can use a pre-made pancake mix, which is what I chose to do).
Directions:
Combine the flour, baking powder, and matcha in a bowl. In a separate mixing bowl, whisk the egg with the sugar and whisk in the milk. Slowly whisk in the dry ingredients and continue to mix until there are no lumps. (Combine matcha and pancake mix in a bowl).

Heat a griddle or fry pan over medium-high. Add a small amount of butter and spread it around the pan. Scoop a ladle of batter onto the pan and let cook on one side about 1-2 minutes, or until bubbles start to form. Flip and cook on opposite until golden-brown on both sides. Transfer to a serving plate and continue procedure with the rest of the batter.

Serving suggestion: add bananas, kiwi fruit, candied ginger, or yogurt on top of these.
image_3

Gourmet burgers!


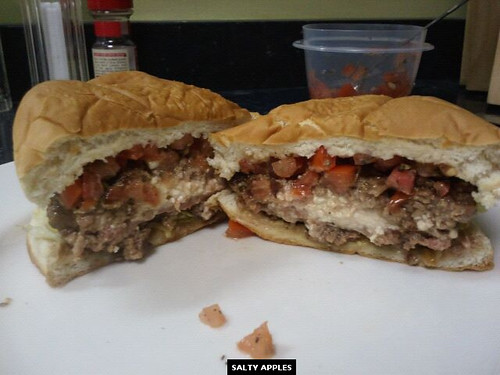
Hello everyone! Today I will be sharing a recipe for delicious feta cheese stuffed burgers with basil-tomatoes on top!
These burgers are great for summer days when you want to feel like you're eating an expensive gourmet burger but don't want to pay the gourmet price! Simple feta cheese stuffed burgers with a home made salsa on top will do the trick!
Here's what you'll need:
  • 4  Italian plum tomatoes, seeded, chopped (or one large tomato)
  • 1  tablespoon fresh squeezed lemon juice
  • 2  teaspoons chopped fresh basil or 1/2 teaspoon dried basil leaves
  • 1/8  teaspoon salt
  • 1 clove of garlic roughly chopped
  • 4-5 grinds of coarsely ground fresh pepper
  • 1  lb. ground beef top round* (or whatever ground beef you want)
  • 1 1/2  oz. feta cheese, crumbled
  • 4  burger buns, split

Directions

  1. In medium bowl, combine tomatoes, lemon juice, basil, salt and pepper; mix well. Let stand at room temperature for 20 minutes to blend flavors. 
  2. Meanwhile, shape ground beef into 8 patties, 4 inches in diameter. Top one side of patty with feta cheese. Top each with remaining patty. Seal patties by pressing edges together. 
  3. Spray broiler pan with nonstick cooking spray. Place patties on pan. Broil 4 to 6 inches from heat for 3 minutes. Carefully turn burgers; broil an additional 3 to 5 minutes or until no longer pink in center.
  4. To serve, place burgers on bottom halves of buns; spoon 1/4 of tomato mixture over each burger. Cover with top halves of buns.   hese burgers are delicious! I hope everyone enjoys them! Happy eating!

image_1